

Requests
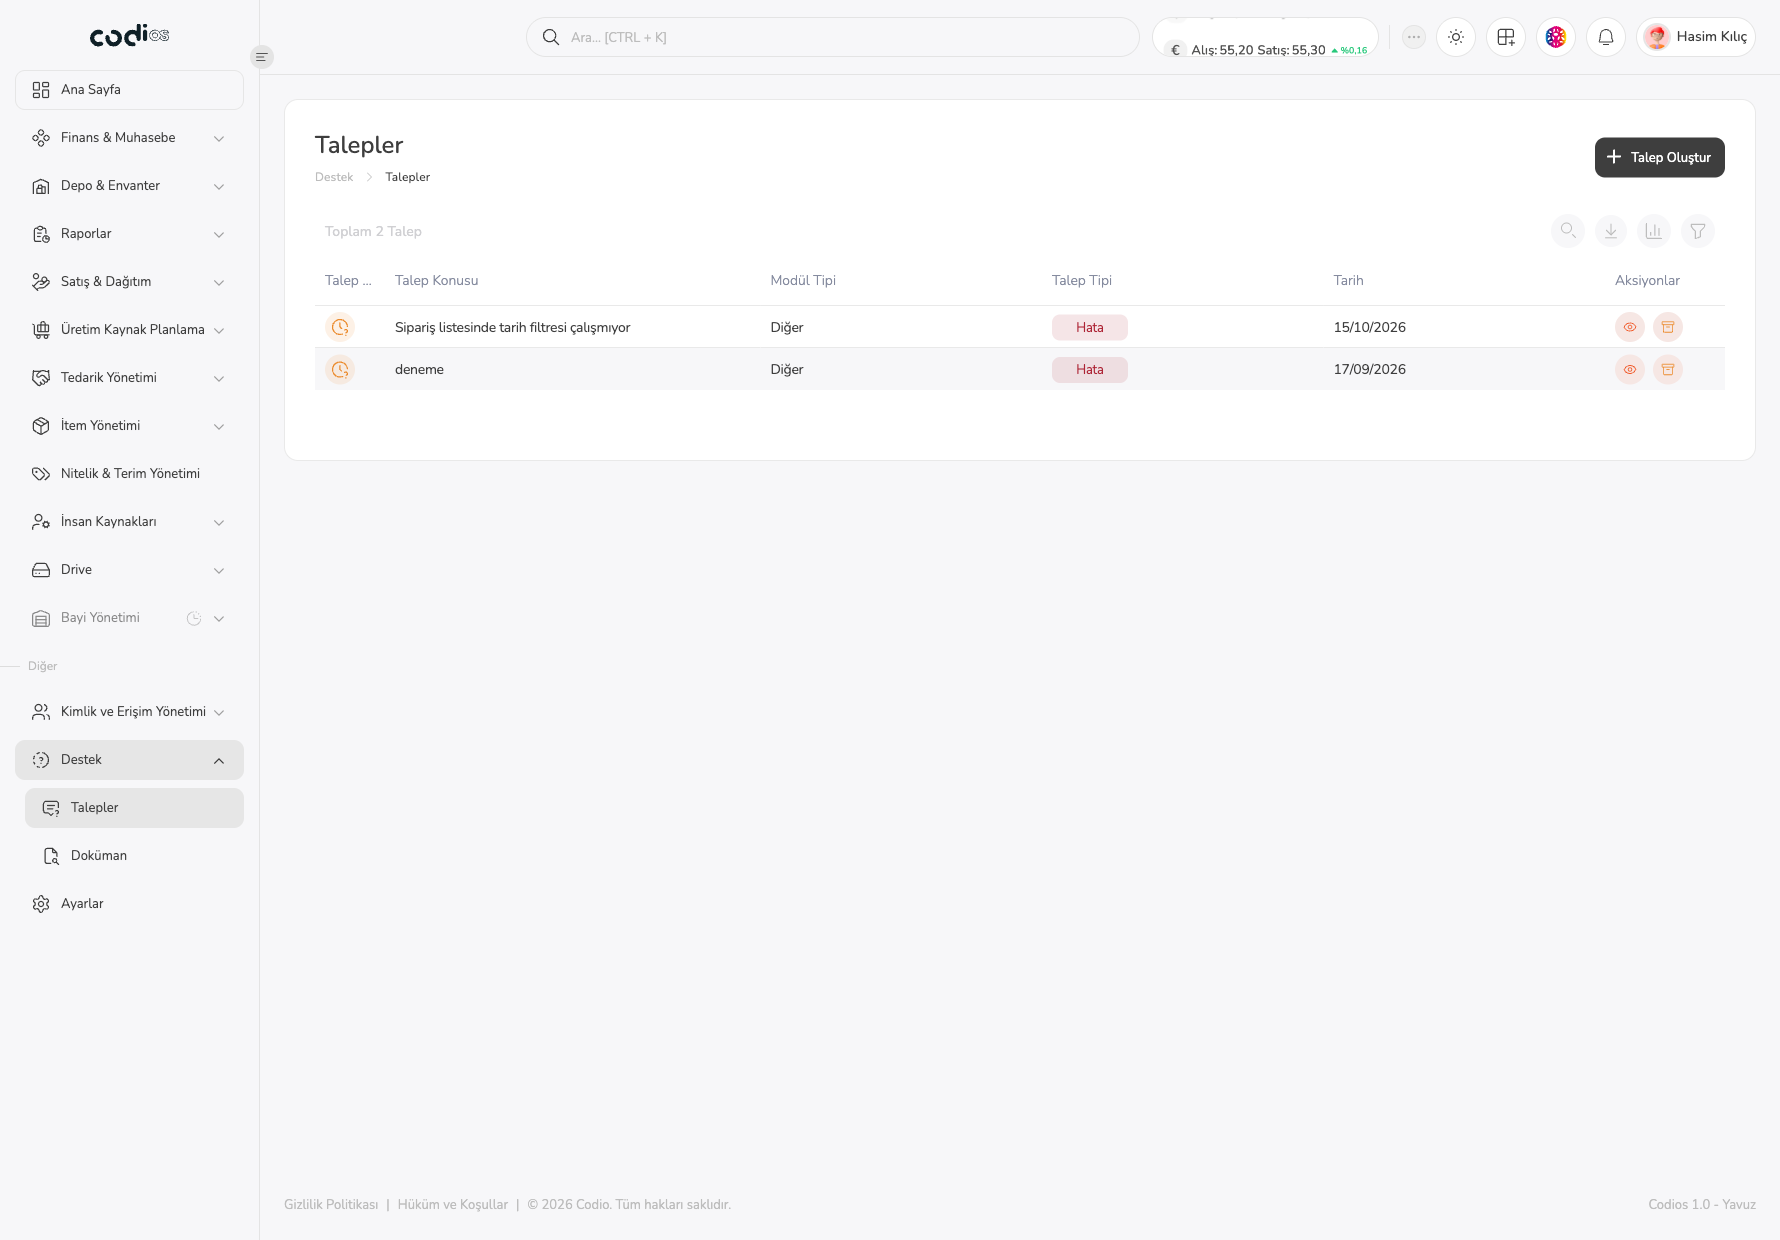
The Talepler screen lets you list, search, filter, and create support requests, and open the detail of a request you created to read and write messages.
Review requests
- Open Diğer > Destek > Talepler from the left menu.
- Check Toplam … Talep above the list to see how many requests you have.
- Use the search, export, column, and filter icons at the top right when needed.
- Check the status, subject, module type, request type, and date columns together.
- To open a request, select the eye icon in its row or the request subject.
 123456
- 1. The Talep Oluştur button opens the new request form.
- 2. The search, export, column management, and filter icons narrow the list.
- 3. The Toplam … Talep text shows the number of requests.
- 4. The icon on the left shows the request status; new requests start with an orange icon.
- 5. The Talep Konusu, Modül Tipi, Talep Tipi (for example Hata), and Tarih columns summarize the request.
- 6. In the Aksiyonlar column, the eye icon opens the request detail.
Create a request
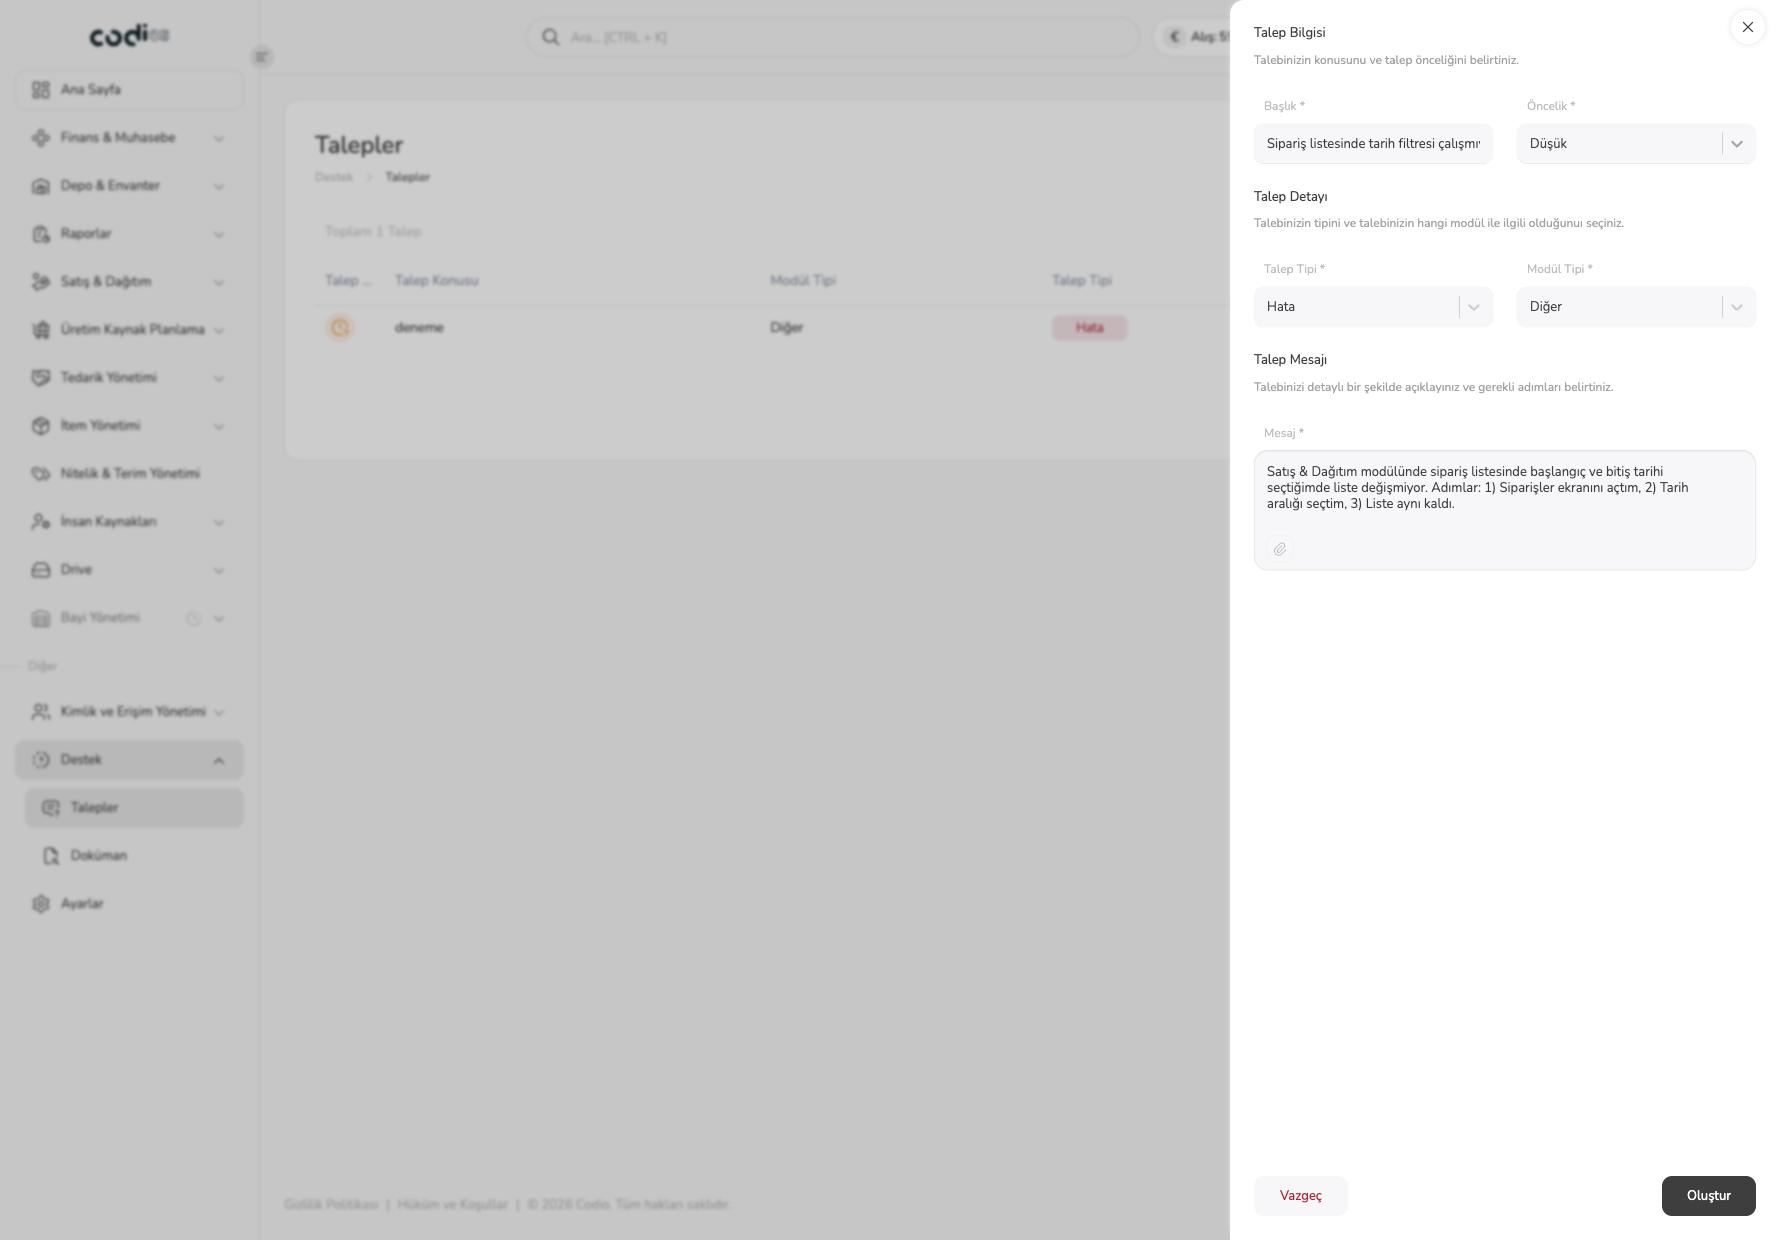
- Select Talep Oluştur. The Talep Bilgisi panel opens from the right.
- Type a short subject in Başlık.
- Choose Öncelik (for example Düşük), Talep Tipi (for example Hata), and Modül Tipi.
- In Mesaj, describe the problem and the steps you took.
- Add a file or photo/video with the paperclip icon if needed.
- Select Oluştur to send the request or Vazgeç to leave.
 1234567
- 1. The Başlık field takes the short subject; it is required, and leaving it empty shows the Başlık gereklidir. warning.
- 2. The Öncelik selection sets the urgency of the request.
- 3. The Talep Tipi selection sets the kind of request (for example Hata).
- 4. The Modül Tipi selection sets which module the request relates to.
- 5. The Mesaj field takes the details and steps; it is required.
- 6. The paperclip icon is for adding a file or photo/video.
- 7. The Oluştur button saves the request; Vazgeç next to it closes the panel.
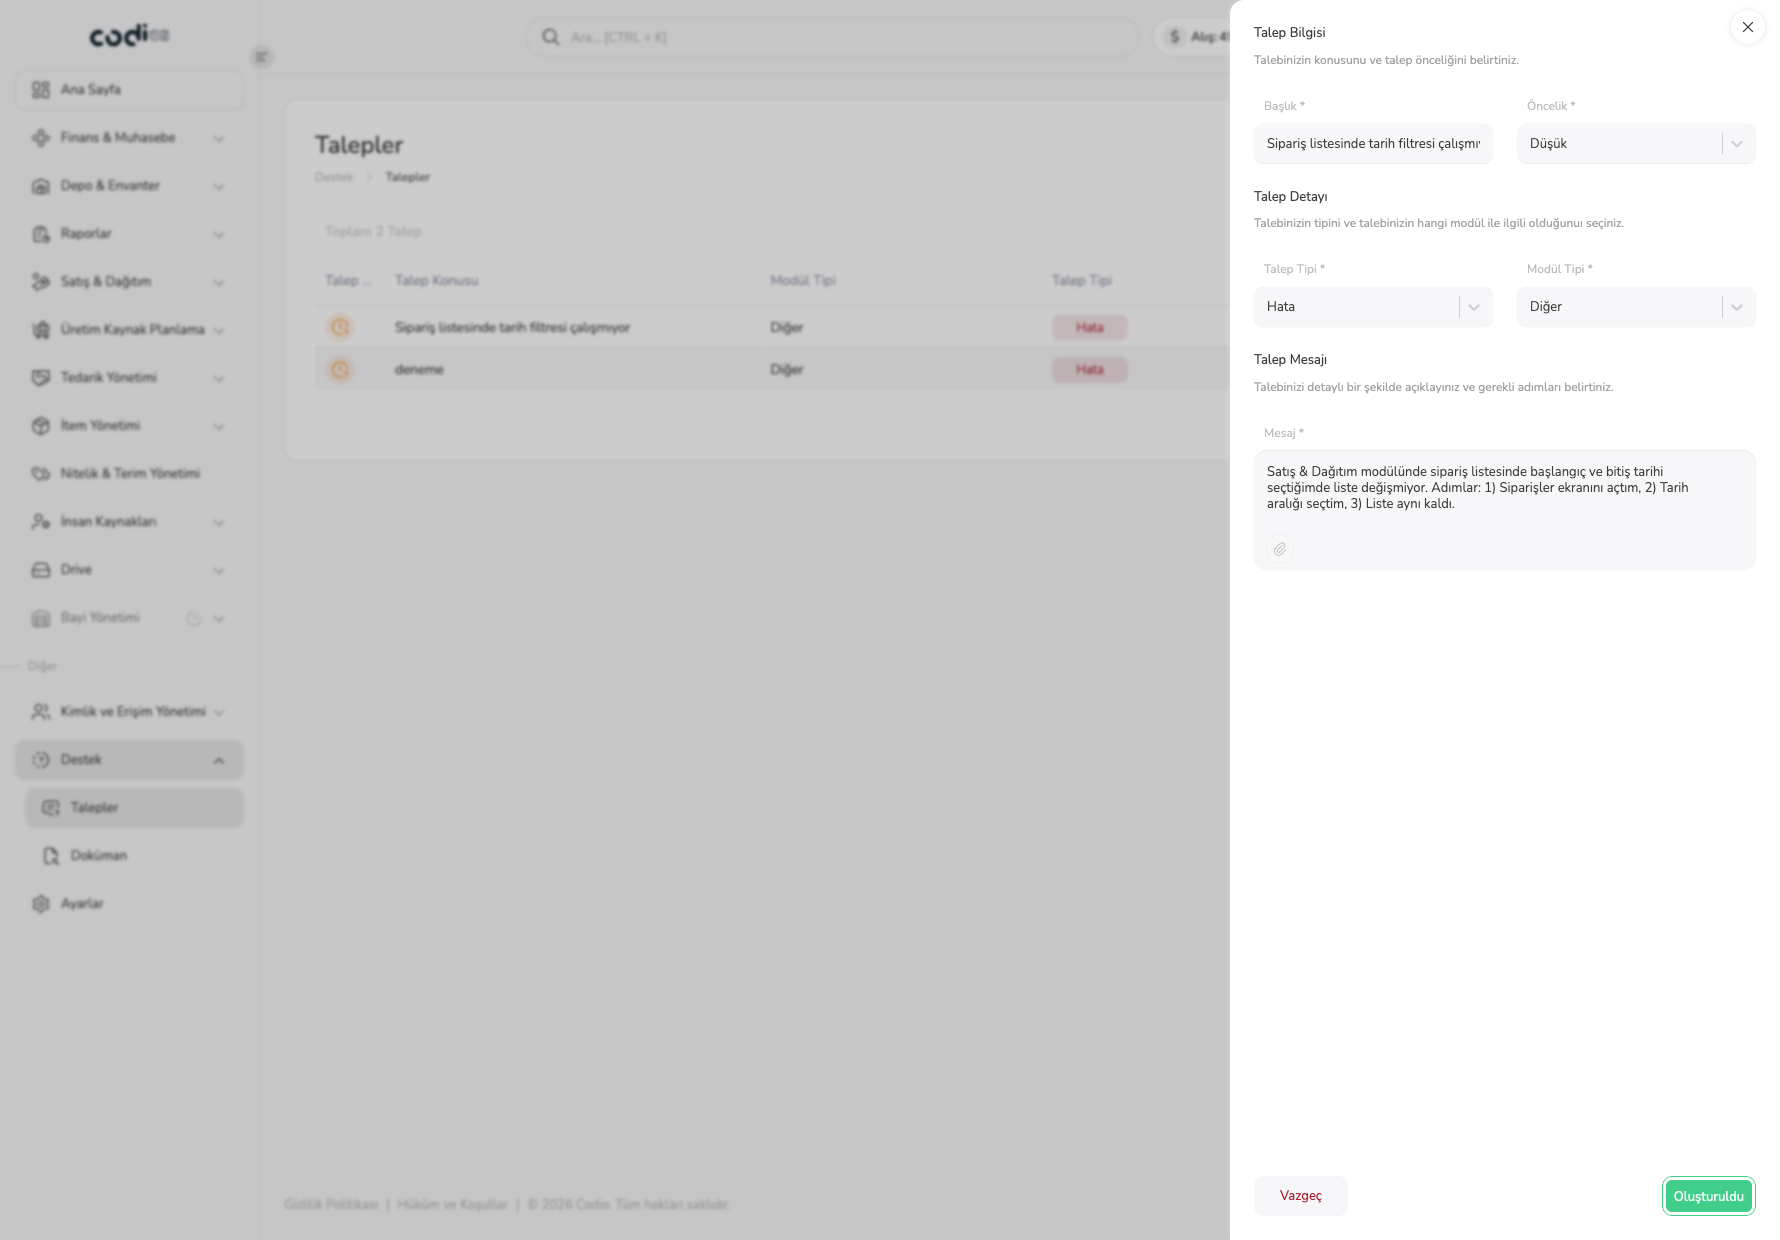
When the request is saved, the Oluştur button briefly shows Oluşturuldu.
 1
- 1. The Oluşturuldu text shows the request was saved; when the panel closes, the new request is at the top of the list.
View the request detail
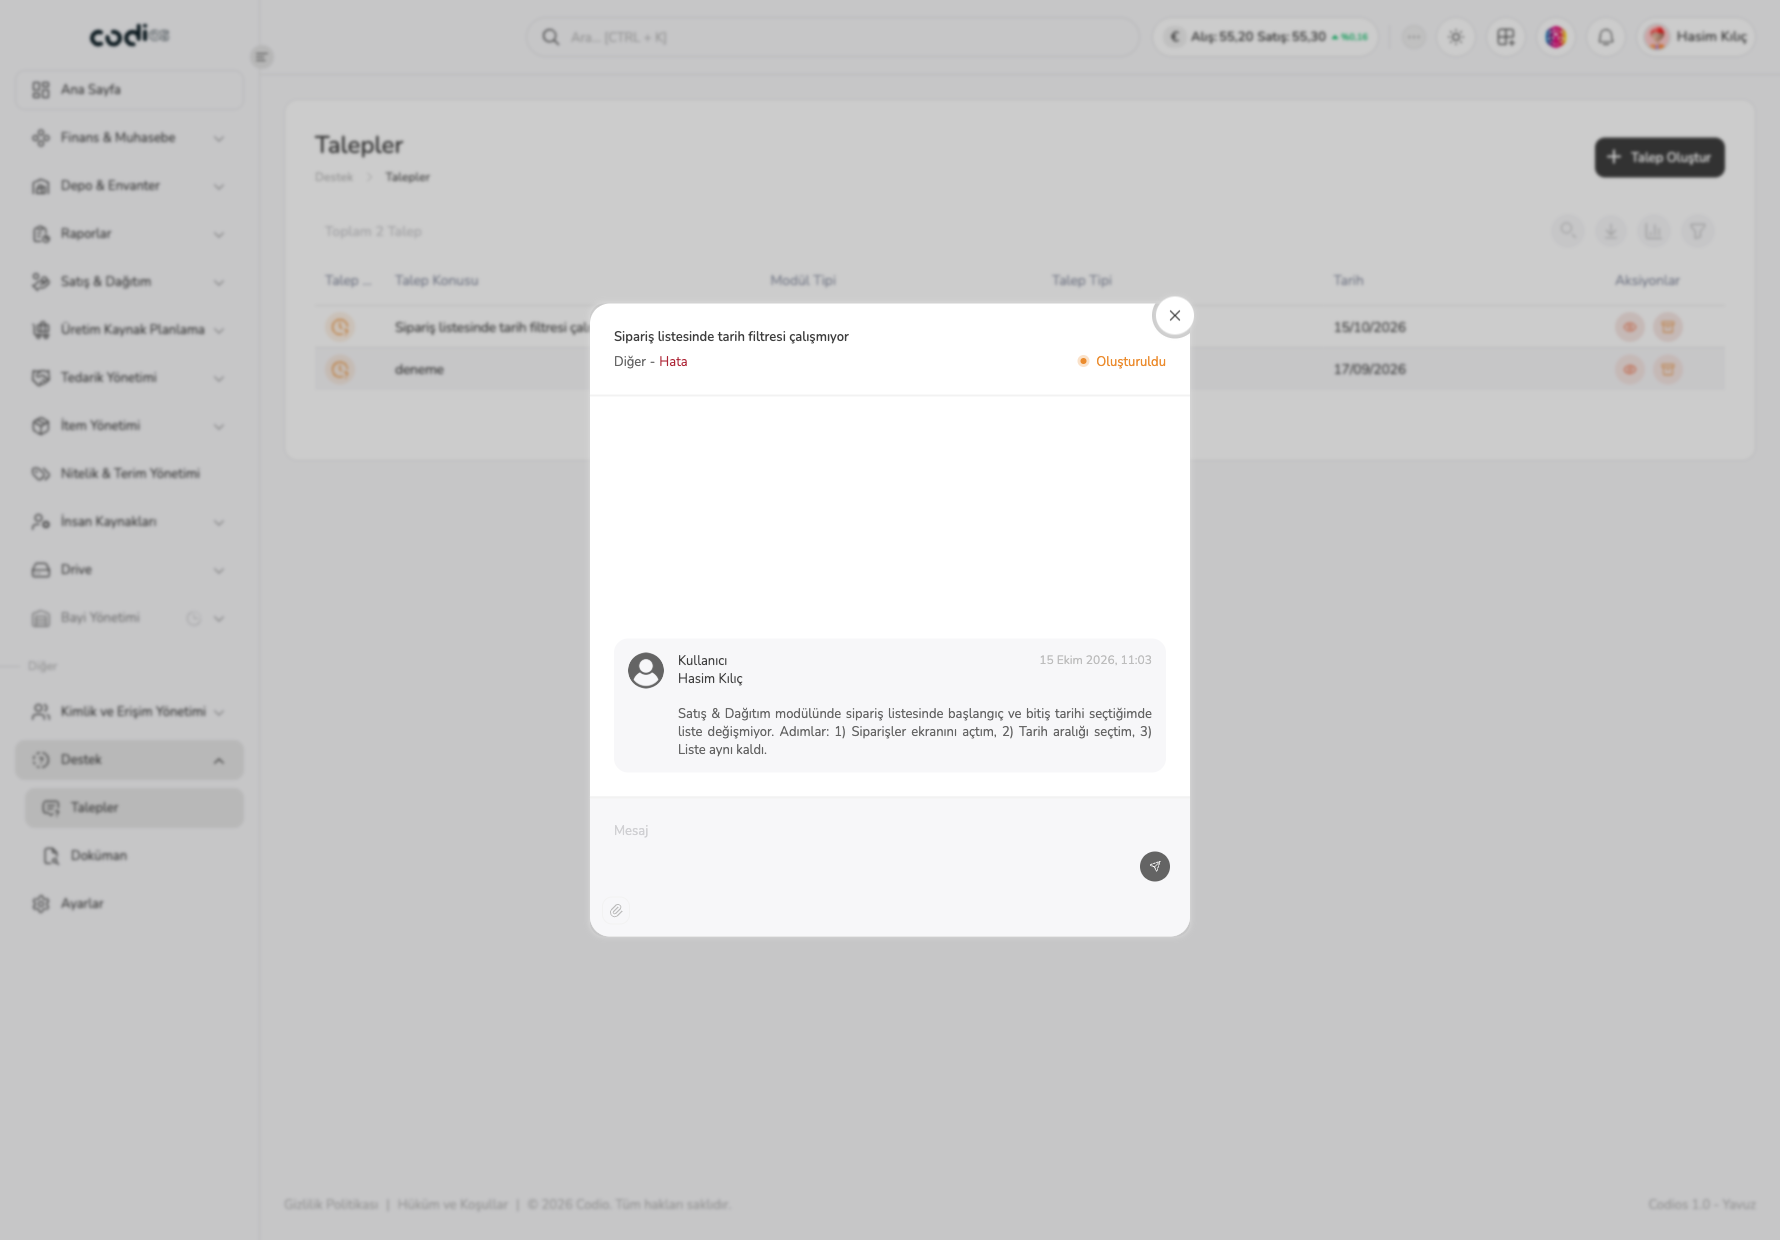
- In the list, select the eye icon or the subject of the request you want to open.
- In the header of the window that opens, see the subject, module and request type, and status.
- Read the messages written for the request, with the sender’s name and time, in the middle area.
- To send more information to the support team, type in the Mesaj field at the bottom and select the send icon.
 1234567
- 1. The request subject appears at the top of the window.
- 2. The Diğer - Hata line shows the module type and request type.
- 3. The status label on the right (for example Oluşturuldu) shows the stage of the request.
- 4. The message card shows who opened the request, when, and the message they wrote.
- 5. The Mesaj field at the bottom lets you write a new message on the request.
- 6. The send icon delivers your message to the request.
- 7. The paperclip icon is for attaching a file to the message.
Points to watch
- The Başlık, Talep Tipi, Modül Tipi, and Mesaj fields are required.
- Stating on which screen and after which steps the problem occurs in the message helps the support team resolve it faster.
- Sending a message, attaching a file, and the other icon in the Aksiyonlar column were not tried while writing this page.