

Procurement Requests
The Tedarik Talepleri screen lets you list procurement requests, follow their details, send them to the buyer, and turn their lines into orders by assigning vendors. To open a new request, see Create Request.
Review the request list
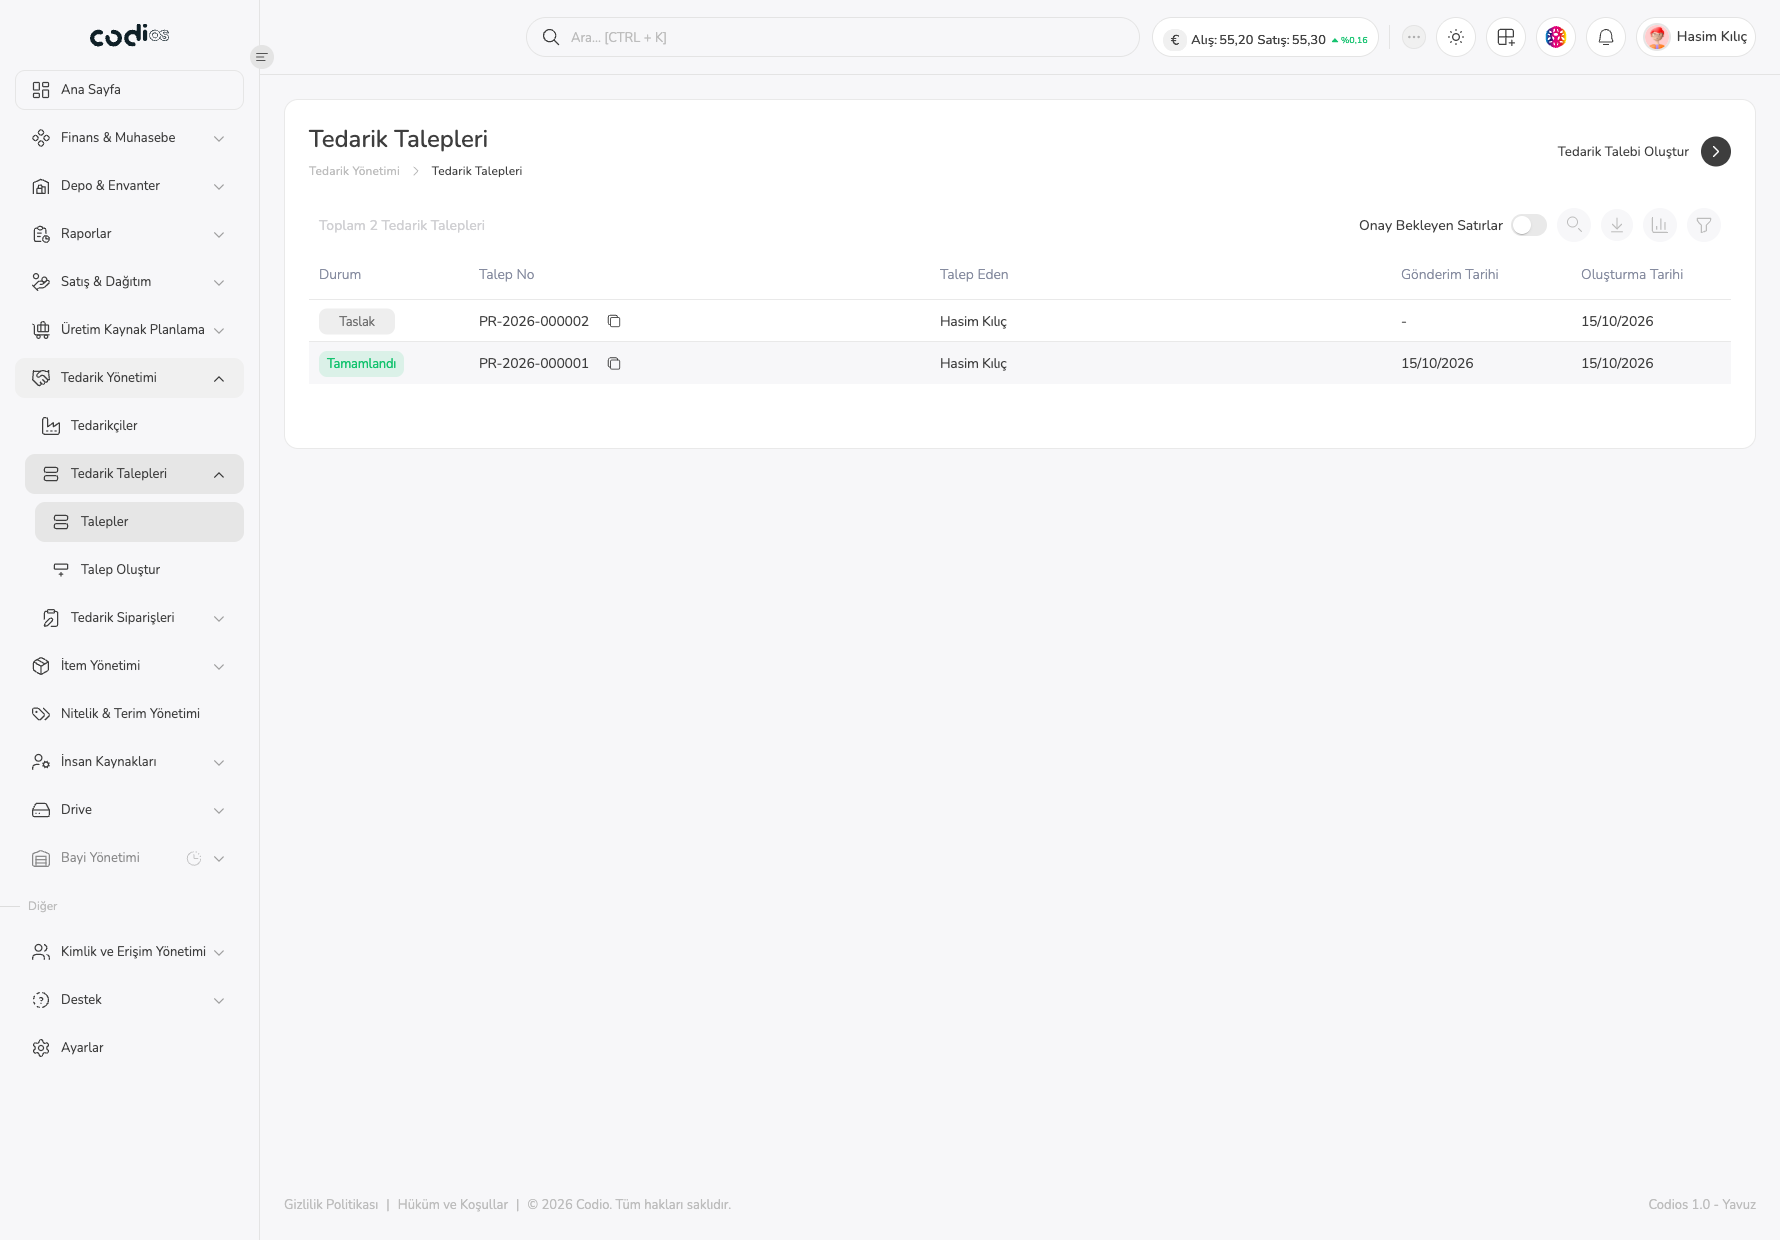
- Open Tedarik Yönetimi > Tedarik Talepleri > Talepler from the left menu.
- Check the Durum, Talep No, Talep Eden, Gönderim Tarihi, and Oluşturma Tarihi columns together.
- Turn on the Onay Bekleyen Satırlar switch to see only requests with lines awaiting approval.
- Select the number of the request whose detail you want to open.
 1234
- 1. The Tedarik Talebi Oluştur button opens the new request form.
- 2. The Onay Bekleyen Satırlar switch and the toolbar narrow the list; the search, export, column management, and filter tools work as on the report screens.
- 3. The Durum column shows the stage of the request: Taslak, Gönderildi, Kısmen Sipariş Edildi, Tamamlandı, or İptal Edildi.
- 4. The number in the Talep No column opens the request detail.
Read the request detail
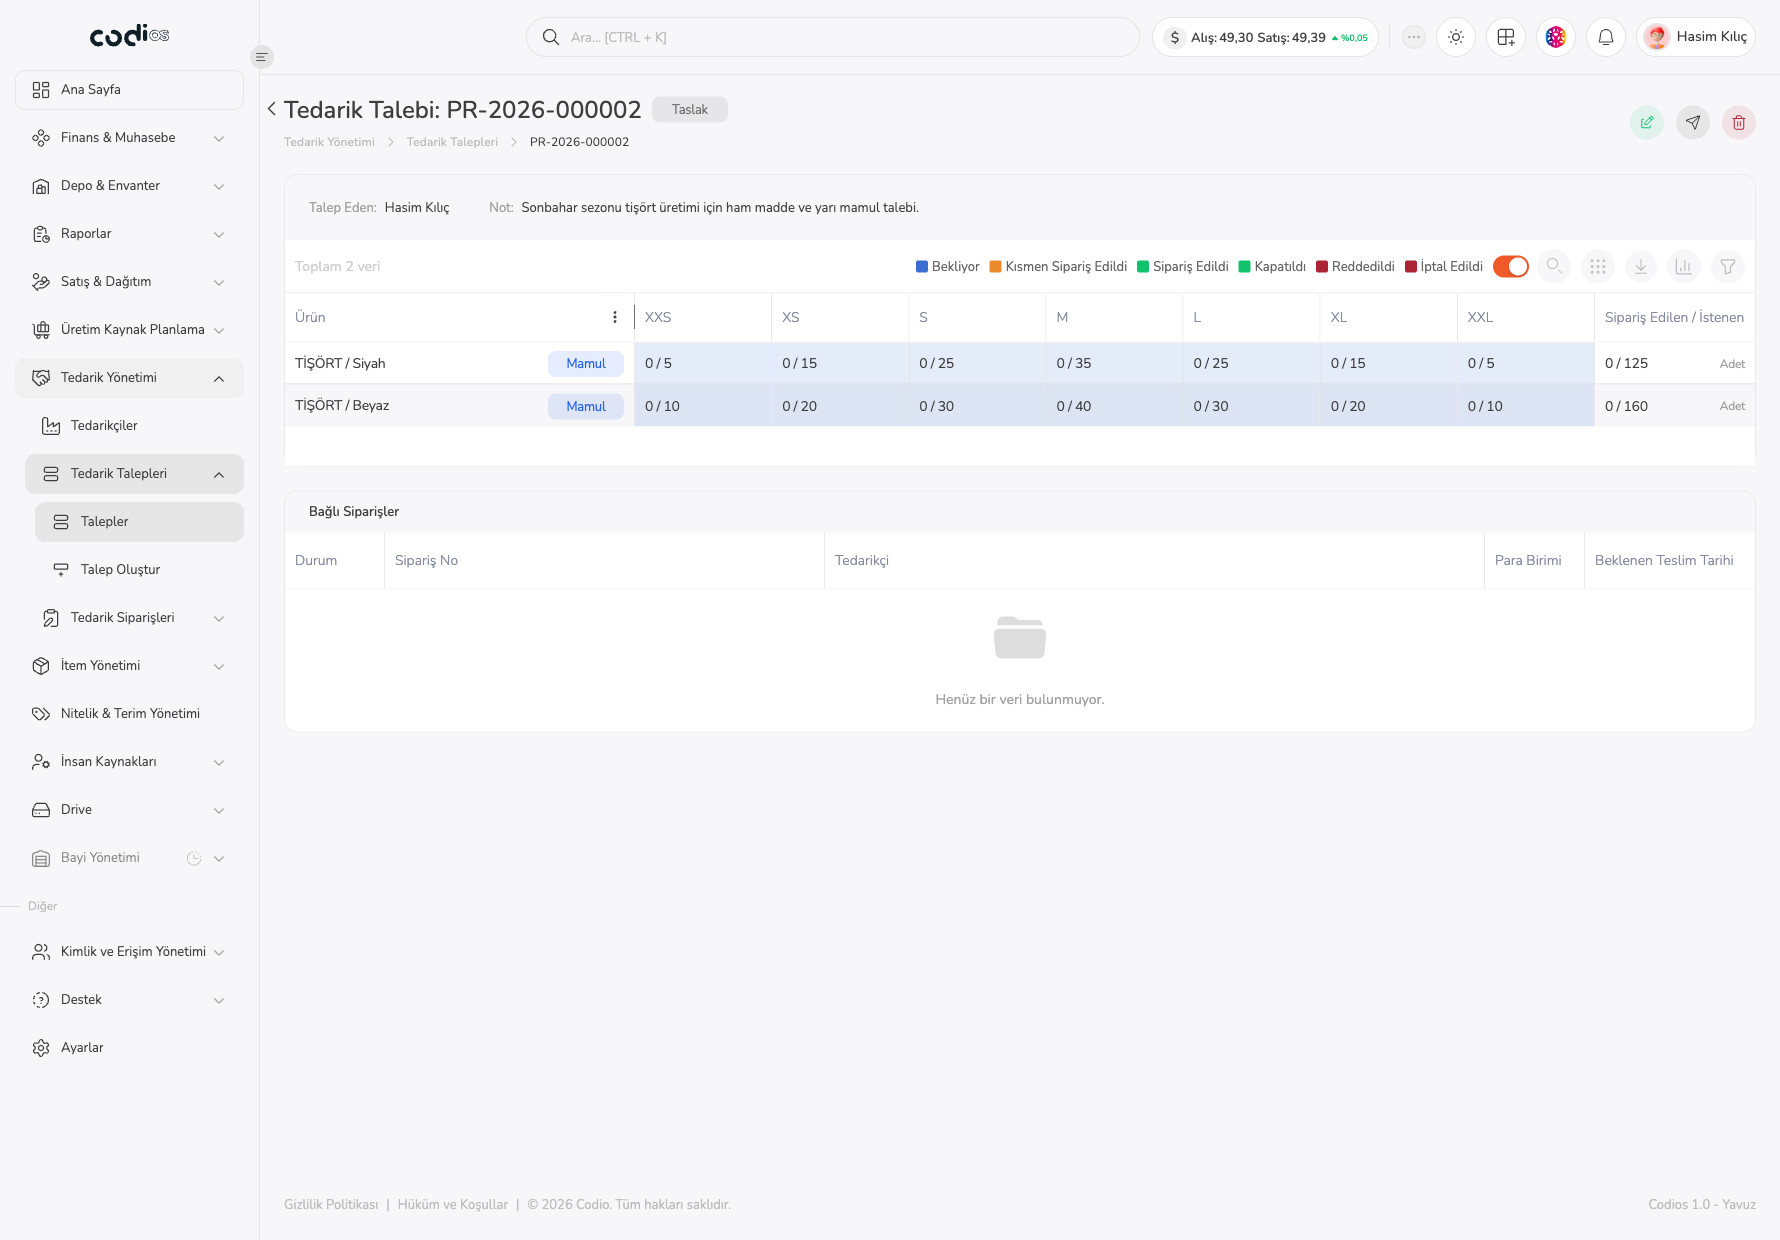
The detail screen shows the request, the requested and ordered quantities per item, and the orders linked to the request.
- In the header area, check Talep Eden and the request note.
- In the item rows, read the ordered / requested quantity for each size. For example,
0 / 5means 5 pieces were requested in that size and none has been ordered yet. - Follow the line status from the cell colors: Bekliyor, Kısmen Sipariş Edildi, Sipariş Edildi, Kapatıldı, Reddedildi, İptal Edildi.
- See the vendor orders created from the request in the Bağlı Siparişler table.
 1234567
- 1. The badge in the header shows the request status; new requests start as Taslak.
- 2. The Düzenle icon opens the draft request for editing.
- 3. The Tedarik Talebini Gönder icon sends the request to the buyer.
- 4. The İptal Et icon cancels the request.
- 5. Talep Eden and Not show who opened the request and its description.
- 6. The size cells show the ordered and requested quantities.
- 7. The Bağlı Siparişler section lists the orders created from the request; it is empty for a draft.
Send the request
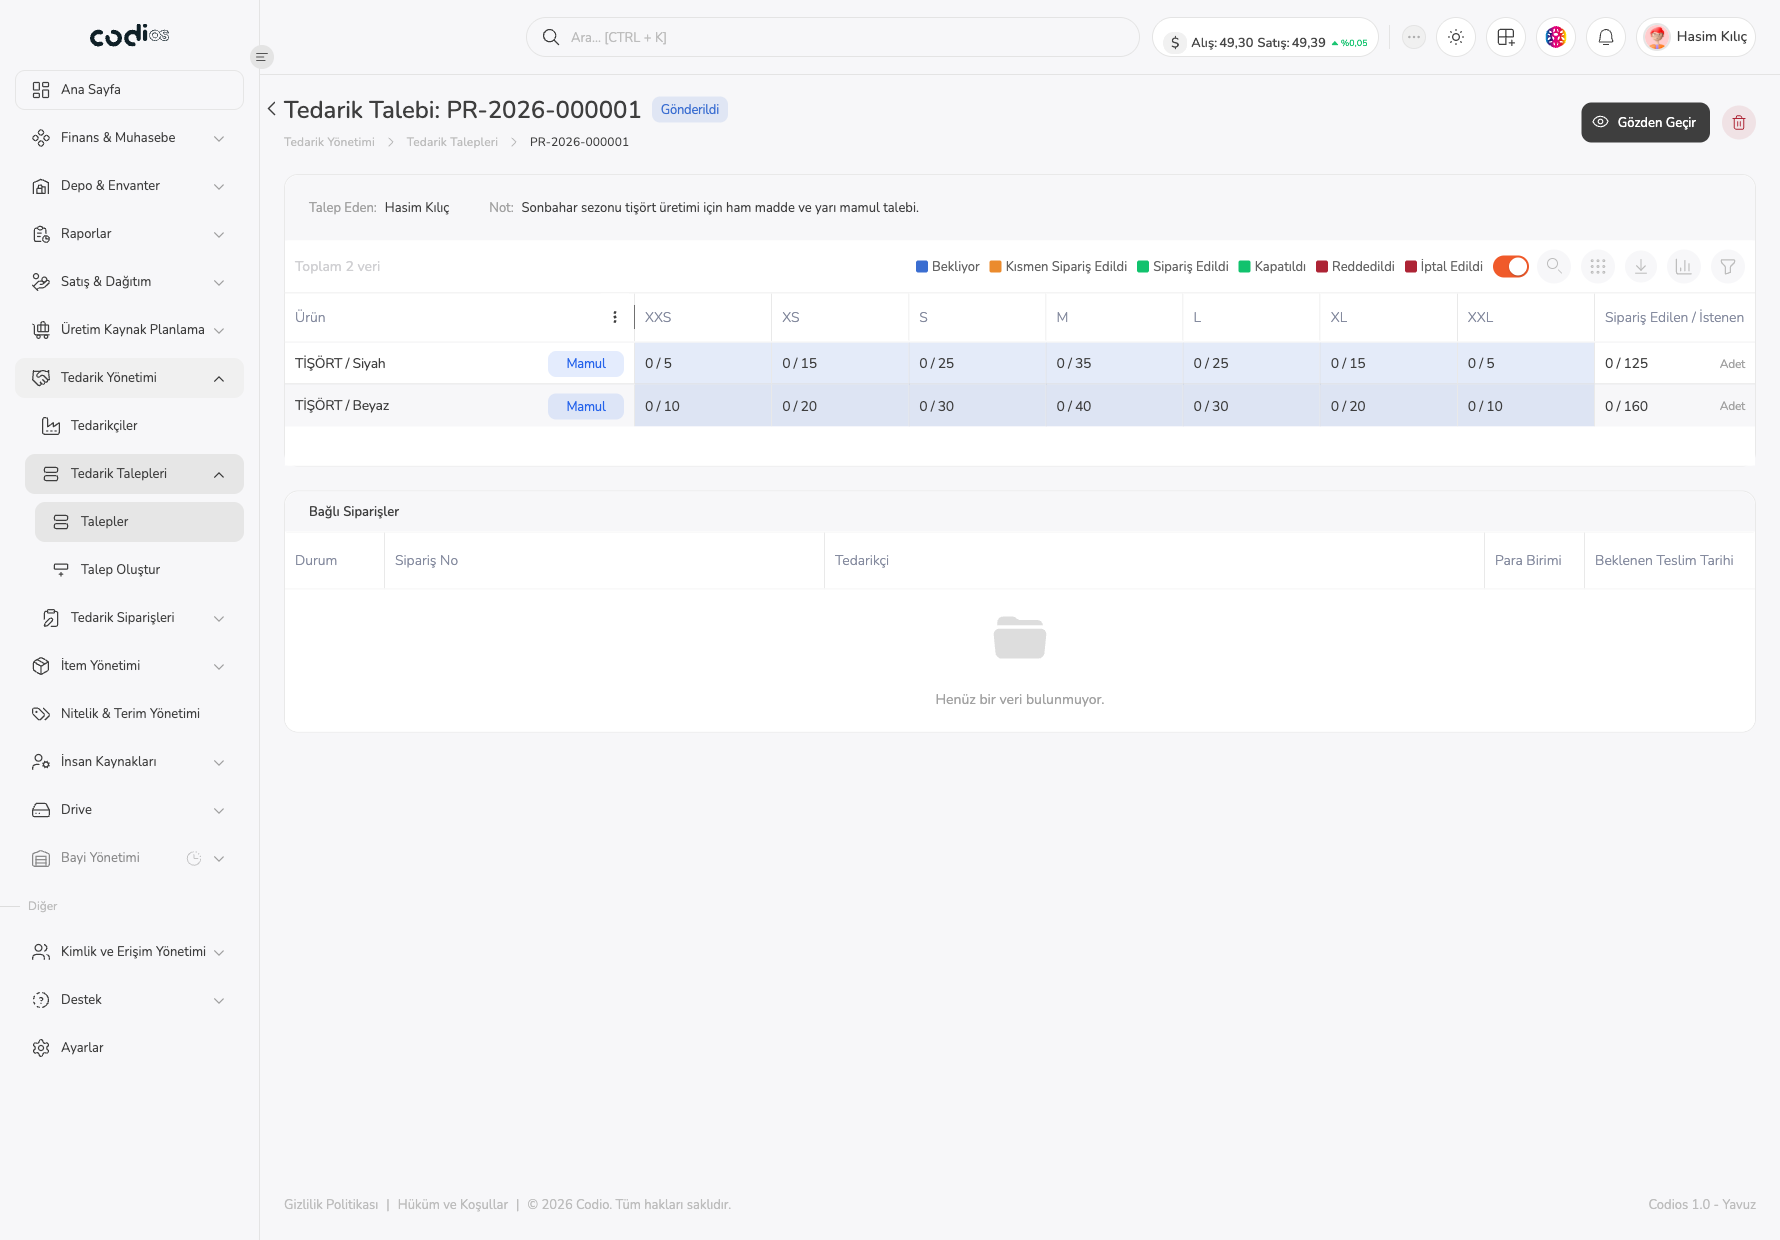
- In the detail of a request in draft status, select the Tedarik Talebini Gönder icon.
- Confirm that the status badge changes to Gönderildi and the Gözden Geçir button appears.
 12
- 1. The Gönderildi badge shows that the request was passed to the buyer.
- 2. The Gözden Geçir button opens the review window to assign vendors and approve the lines.
A request in draft status cannot be approved or closed; send the request first.
Review the request and turn it into an order
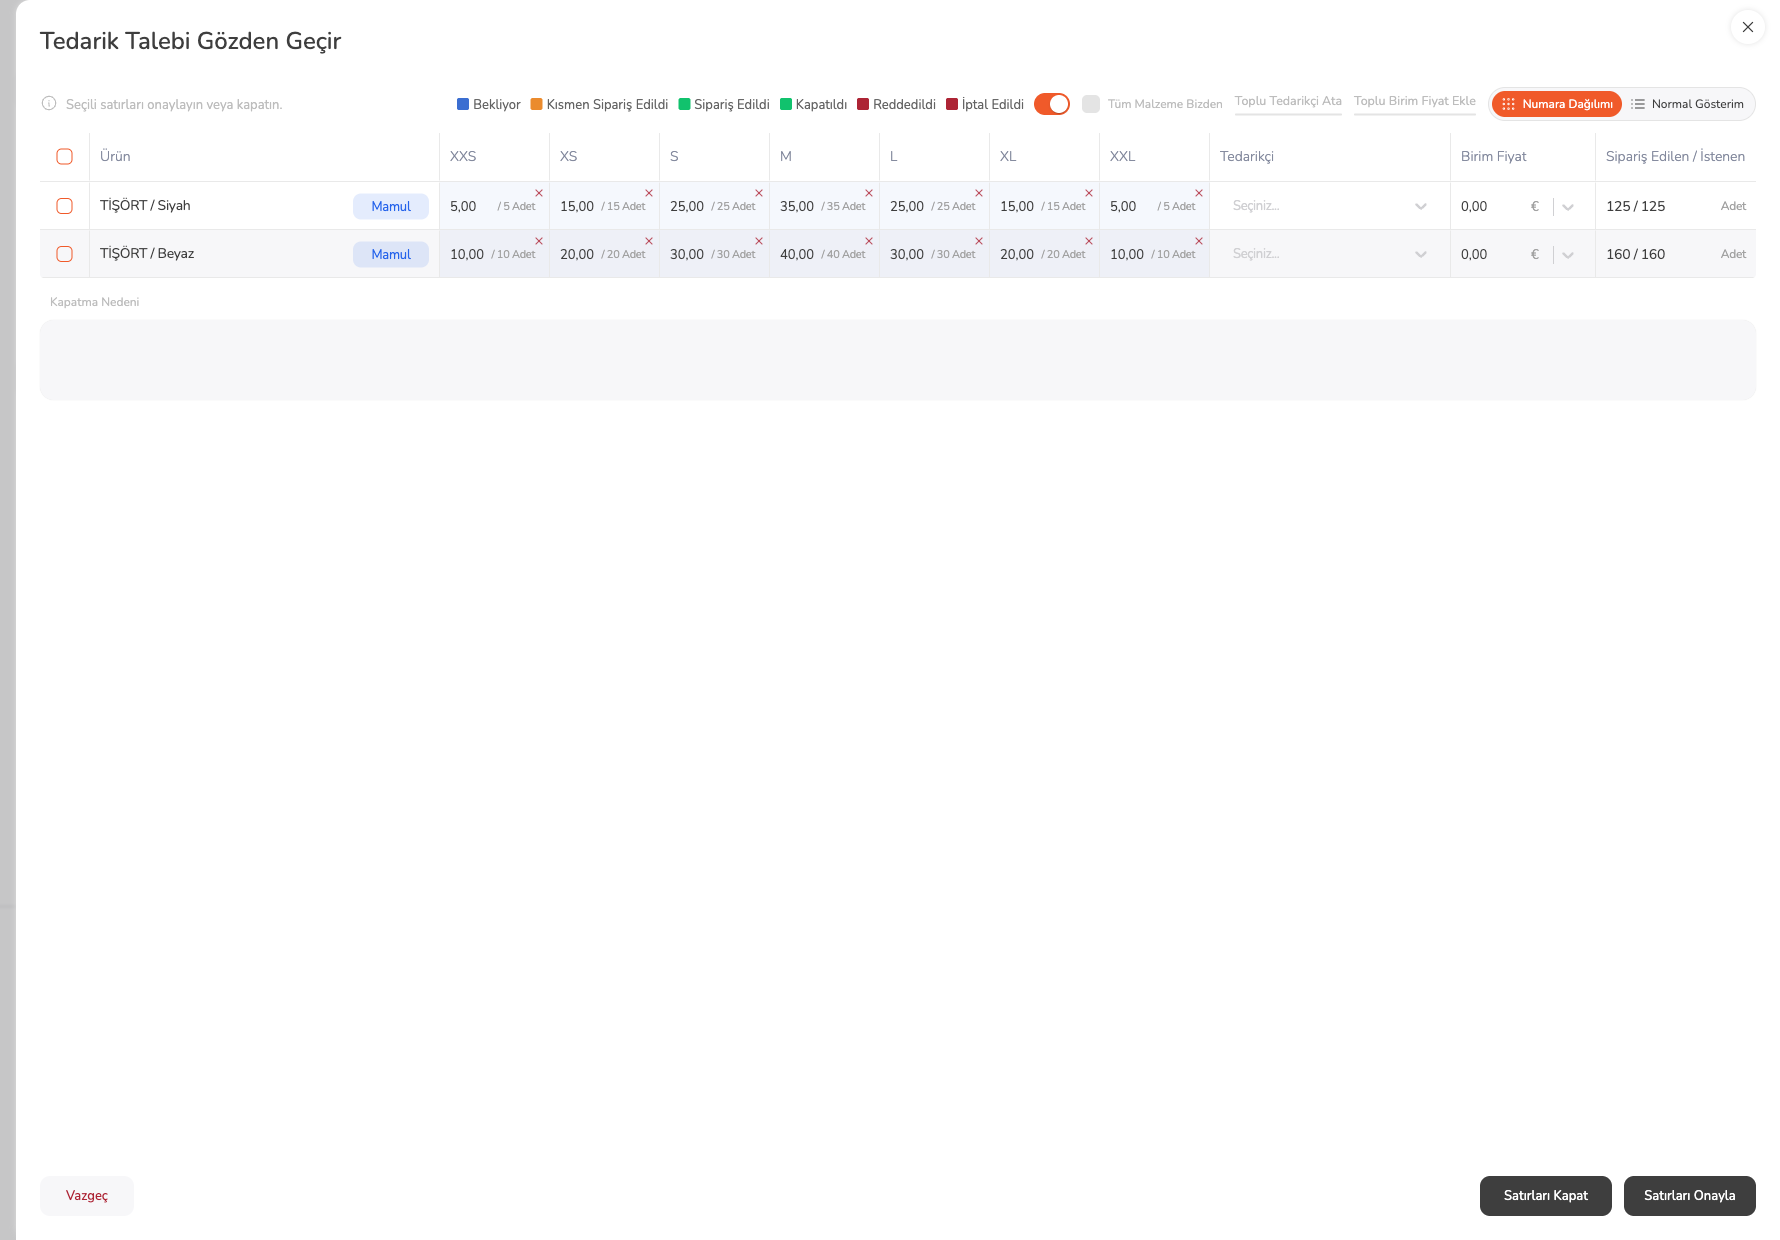
- Select Gözden Geçir. The Tedarik Talebi Gözden Geçir window opens.
- Select all lines with the box in the top row, or tick only the lines you want to process.
- Use Numara Dağılımı to see the size breakdown and Normal Gösterim to see totals only.
- Assign the lines to a vendor and enter a unit price (the next two sections).
- Use Satırları Onayla to turn the lines into an order, or Satırları Kapat for lines that will not be ordered. Fill in Kapatma Nedeni when you close lines.
- Select Vazgeç to leave without changes.
 12345678
- 1. The box in the header selects or clears all lines.
- 2. Toplu Tedarikçi Ata assigns the same vendor to the selected lines.
- 3. Toplu Birim Fiyat Ekle applies the same unit price to the selected lines.
- 4. The Numara Dağılımı and Normal Gösterim buttons switch the view of the lines.
- 5. The size cells show the quantity to order and the requested quantity for each size (for example
5,00 / 5 Adet). - 6. The Kapatma Nedeni field takes the reason when you close lines.
- 7. Satırları Kapat closes the selected lines without ordering.
- 8. Satırları Onayla turns the selected lines into a vendor order.
Assign lines to a vendor in bulk
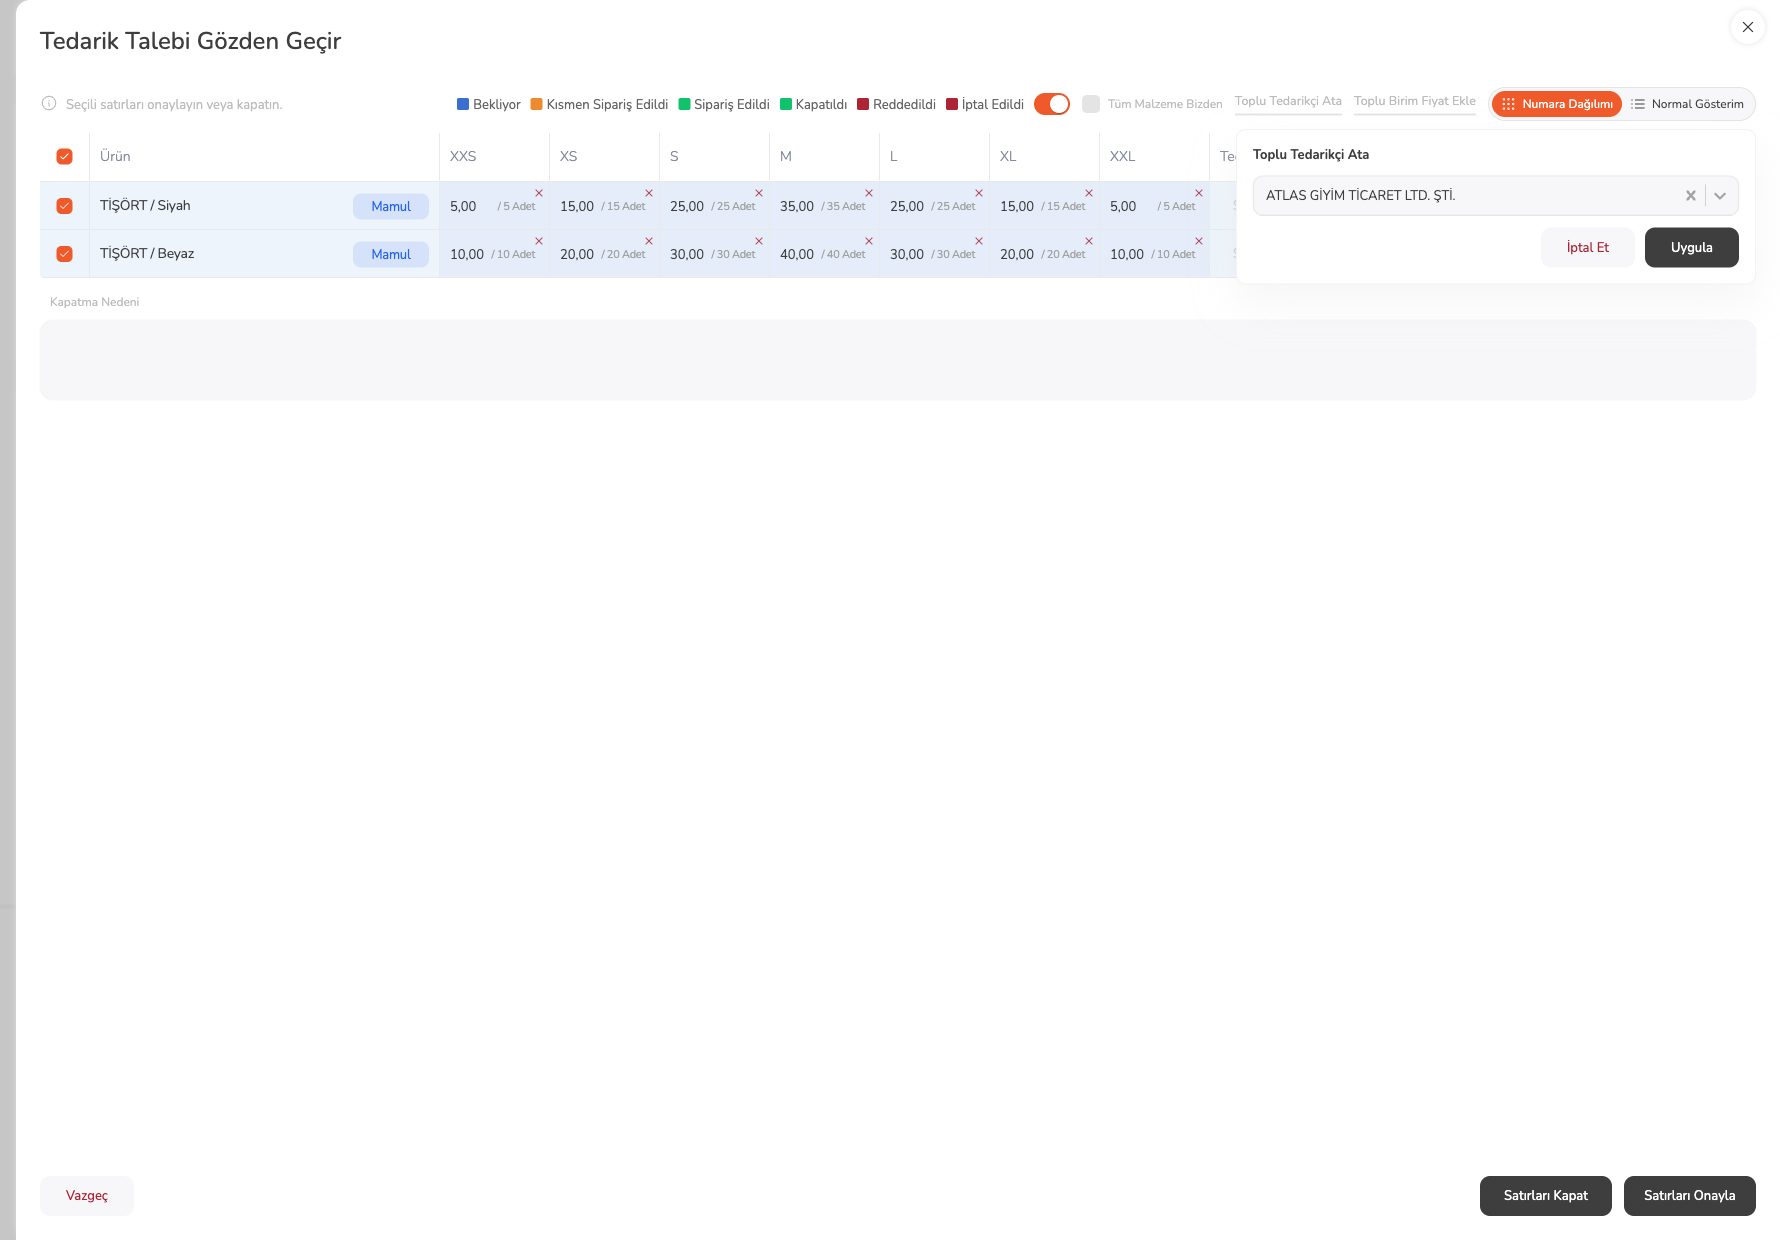
- Select the lines and select the Toplu Tedarikçi Ata link.
- In the Toplu Tedarikçi Ata box, choose the vendor.
- Select Uygula to apply the choice to the lines, or İptal Et to leave.
 123
- 1. Choose the vendor to assign to the lines from the vendor list.
- 2. İptal Et closes the box without assigning.
- 3. Uygula assigns the chosen vendor to all selected lines; the button is disabled until a vendor is chosen.
Enter a unit price in bulk
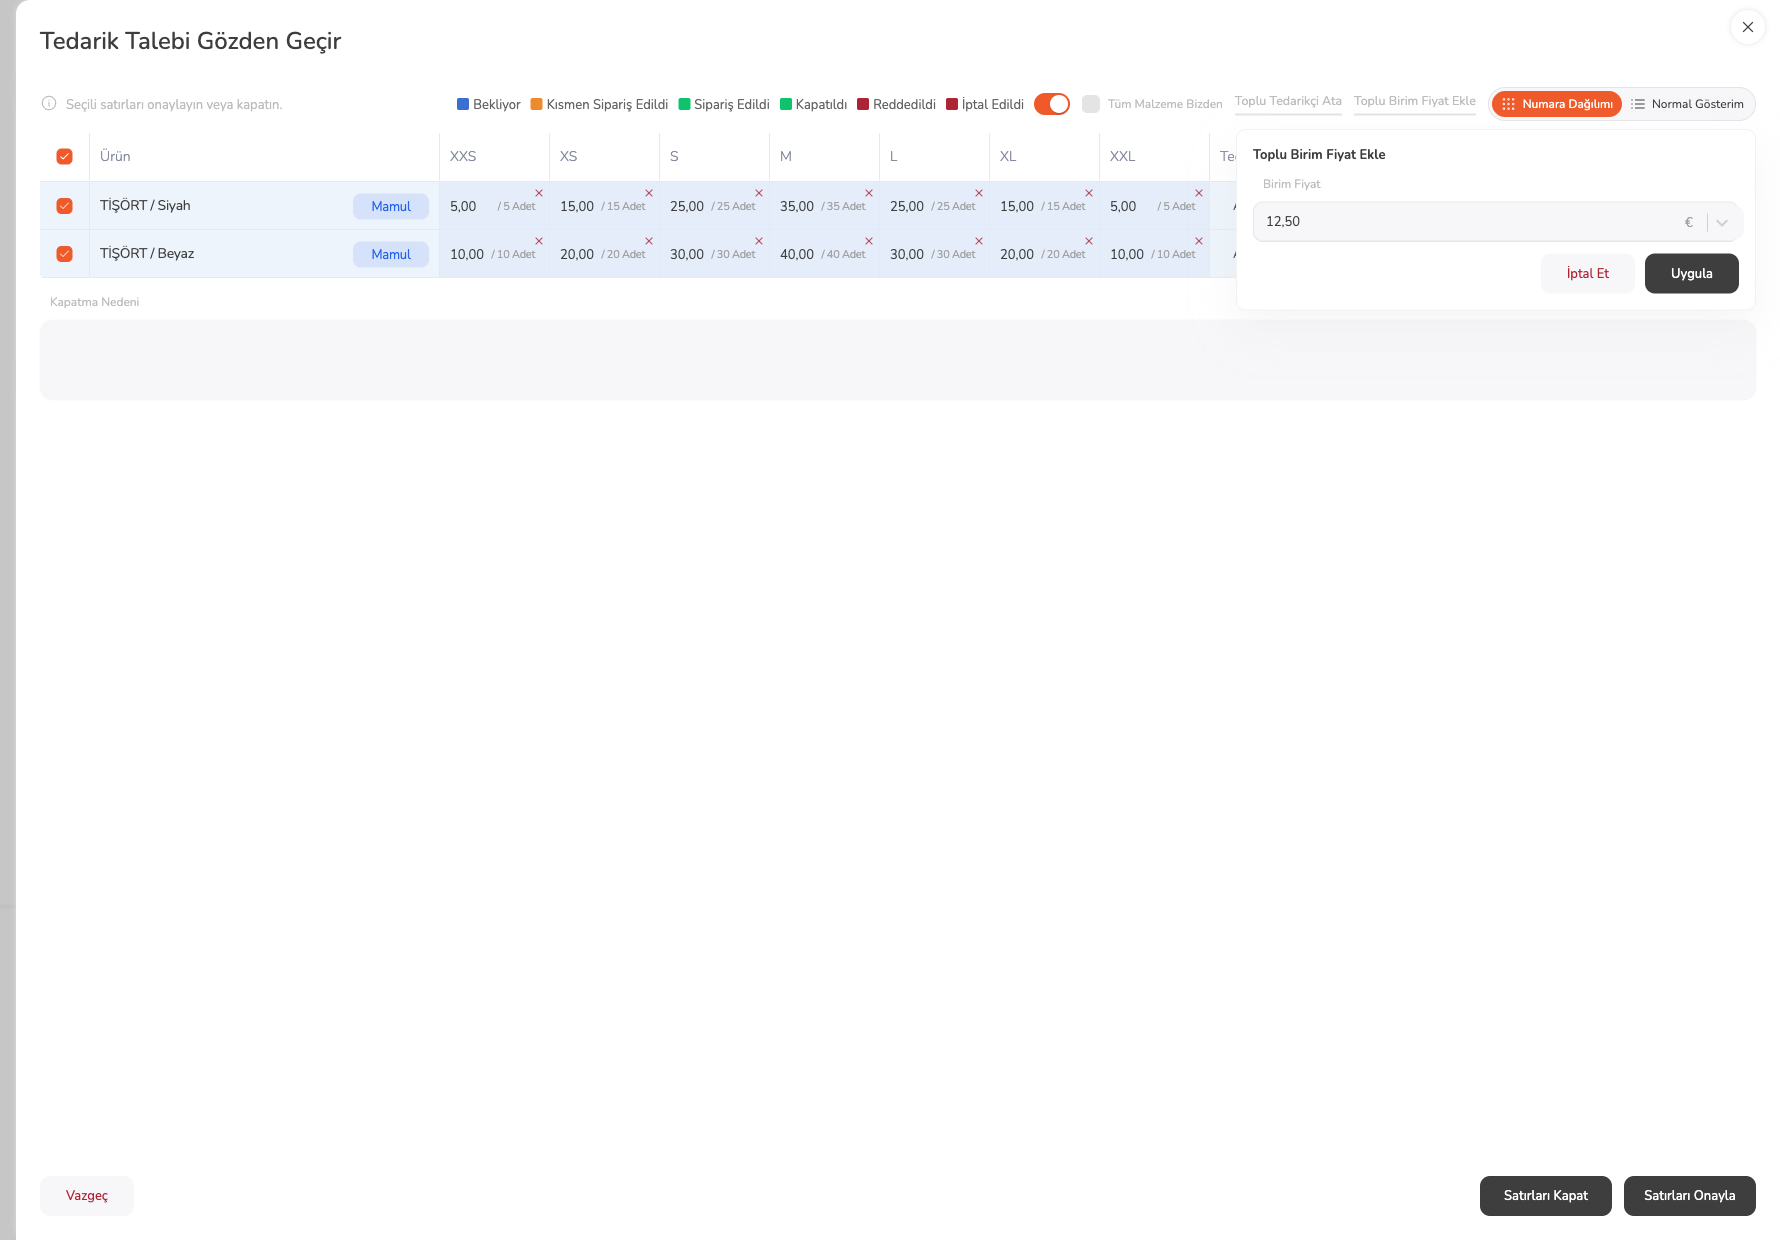
- Select the lines and select the Toplu Birim Fiyat Ekle link.
- Type the price in Birim Fiyat and change the currency if needed.
- Select Uygula.
 12
- 1. The Birim Fiyat field and currency selection set the price of the selected lines.
- 2. Uygula applies the price to the selected lines.
Check the assignments and approve
 123
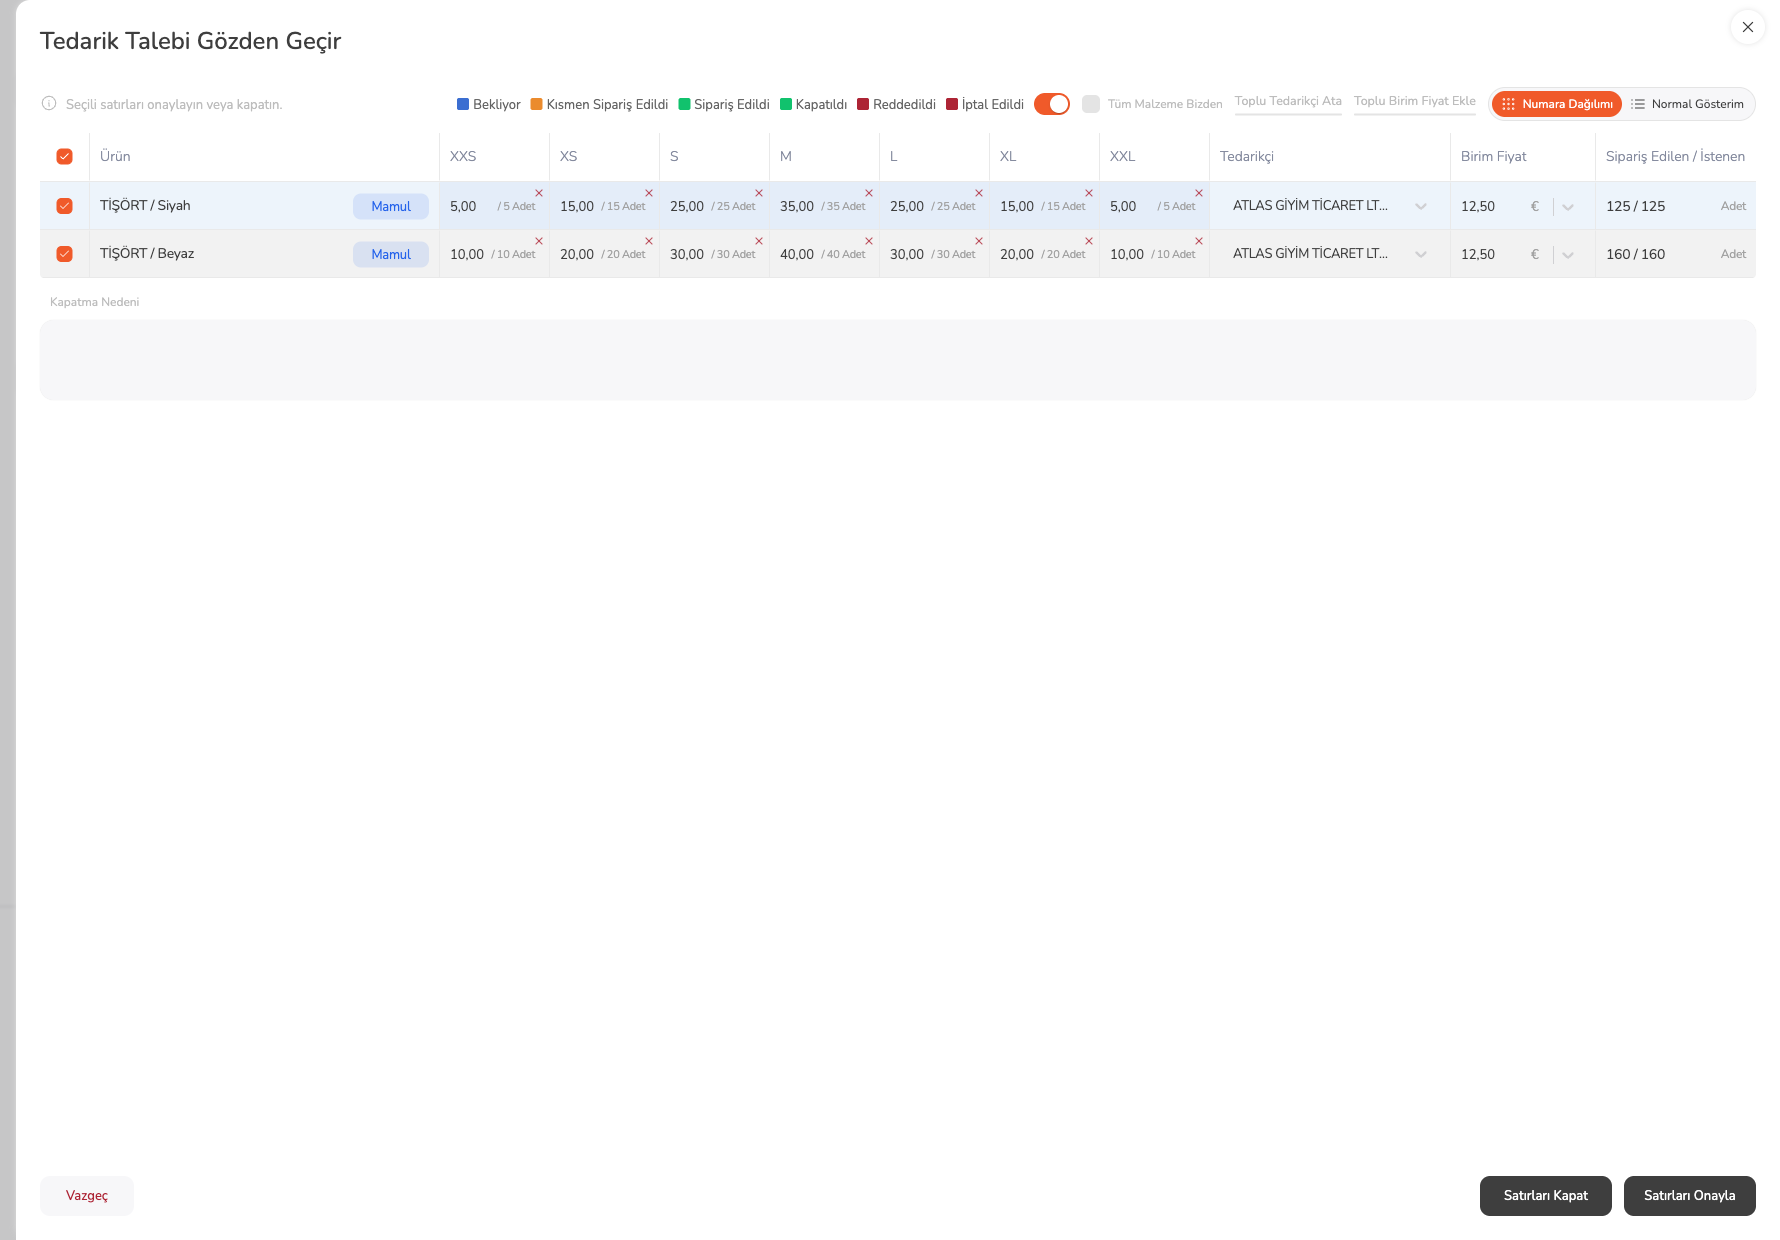
- 1. The Tedarikçi column shows the vendor assigned to each line; you can also change it per line.
- 2. The Birim Fiyat column shows the line price and currency.
- 3. The Satırları Onayla button turns the selected lines into a vendor order.
Check the approval result
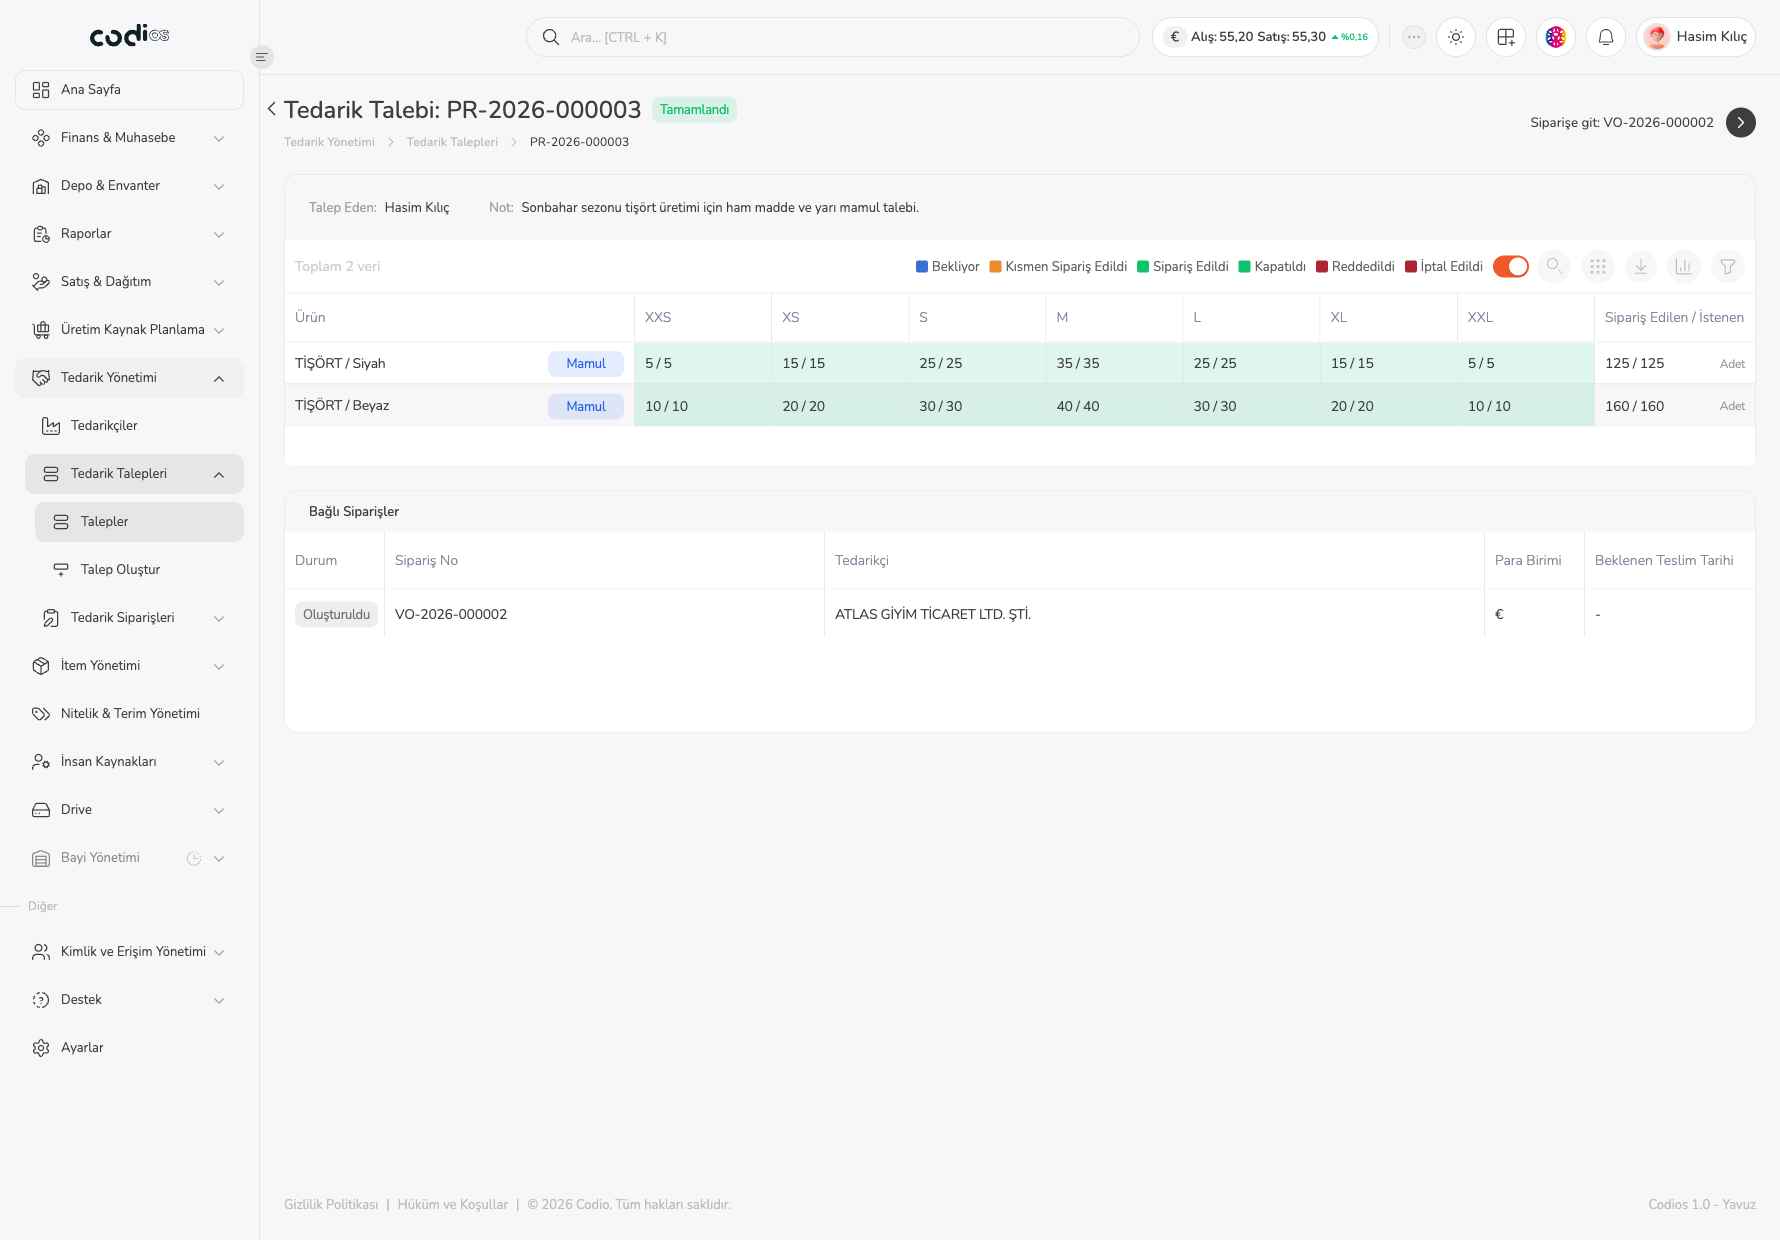
When the lines are approved, the request status becomes Tamamlandı, the lines turn green, and a Siparişe git link appears at the top right.
 1234
- 1. The Tamamlandı badge shows that all lines were processed.
- 2. The Siparişe git link opens the detail of the vendor order that was created.
- 3. The size cells now show the ordered quantity equal to the requested quantity (for example
5 / 5). - 4. The Bağlı Siparişler table shows the order number, vendor, currency, and expected delivery date. The order is also listed on the Vendor Orders screen.
Points to watch
- Cancelling a request cannot be undone; a confirmation is requested first.
- If you enter more than the requested quantity, you must write a Fazla miktar nedeni.